The Vinyl Tile Horror Part 5
Friday arrived and
Mr. Flooring Man was finally working on our bedroom after sending him a nasty
message. We asked him when, in fact, the floors would be done and he replied,
“Absolutely on Sunday.” Good. Sunday came and we held our breath for the anticipated
floor reveal. We walked into our bedroom and shockingly with the first glance,
everything looked really good!
Except.....(yea, I knew you were waiting for that).......none of the corner tiles were ever put on and I forgot to mention that they were also doing the same pattern into the master bath and..our toilet was no where to be found. The flooring man even wrote us on Sunday giving us the go ahead that they were finished. Umm...what about the toilet because I’m not about to drop a squat into a little pipe running into the ground!? Also, when they had torn up the tile in the hall bath, they had gouged a chunk of caulk off of the side of the toilet and all of a sudden out of nowhere we started to find cockroaches in our bathroom. GROSS! I do NOT do bugs! Matt came to the rescue and filled in an entire chunk missing off the toilet with caulk. It looks atrocious but hey, no more bugs. But, what that means is that they like to come up from the base of the toilet and when we walked into our master bath with an entire toilet missing and a huge hole in the floor leading to the sewer line, I just imagined an image out of a horror film of thousands of roaches crawling out of the pipe in a stampede ready to attack.
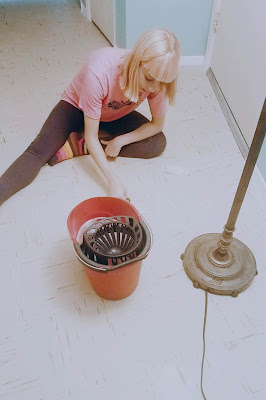
In order to defend myself I covered the hole with a bowl. Okay, maybe not the best solution but when you can’t find your toilet because Mr. Flooring Man hid it...what else can you do? So, we went to church and he put our toilet back on. Hurray. As you remember, the next step is clean, seal and polish. We’re at it again. Sealing twice and polish coating 5 times with an hour in between coats to dry. It takes all day....we didn’t quite get to the 5th coat that day so we decided to go to bed and finish it the next. With polish, you need to realize that once you put that polish down, you are agreeing to keep whatever is on the floor to be there forever. One speck of hair....yup, it’s going to be a marking of you until the end of time, or until you replace your floors, but you get the point. With that in mind, we decided to clean the floors one last time before putting down the last polish layer. Now, I’m not putting any blame on anyone but Matt decided to clean the floors with the Armstrong cleaner that on the bottle read “step one”. But, he thought, it’s cleaner and it’s the same brand as the floors so, it will be fine. We got the floors all squeaky clean and let it dry. We came back to a nightmare. Imagine taking a gallon of super glue and just squeezing it all over the floors. That’s what it looked like. Hard, cloudy, white blobs were everywhere! I guess when using step 1 on step 3, it makes the polish come up in mountain clumps. Off to our second home called the Home Depot. We purchased a bottle of Armstrong’s “New Beginnings”. Doesn’t that sound so nice!? Like, after you get a nice massage...”New Beginnings” or getting a new haircut and color...”New Beginnings”….but, no...get on your hands and knees, scrub your mistakes until your knuckles bleed and you cry your sorrows all over the floor...”New Beginnings”. There we are, scrubbing mounds of polish until we got back down to the raw tile. Start all over again and FINALLY!!! Finally...our floors are complete!! After all of that, this deserves a before and after picture!


Matt shared this with me. We can fully understand your plight. We are almost 5 months into a brand new home still battling flooring issues.
ReplyDeleteThe phone starting ringing and hasn't stopped since the law suit papers were delivered to the builder this afternoon. It appears they are really motivated now.
Your floor looks awesome! Kristie likes the colors too.